HomeKit can show the current temperature in a room, but Apple's Home app is built around the present moment. It is useful when you want to know whether the living room is 68 F right now, but it does not answer the next questions: when does the room cool down, how stable is the bedroom overnight, or how quickly does the heating recover in the morning?
DataJot fills that gap by turning repeated HomeKit readings into a time series. With Apple Shortcuts, you can read a HomeKit sensor on a schedule and save each value in DataJot for later review.
This guide focuses on temperature, but the same workflow also works for humidity, air quality, brightness, and other numeric HomeKit measurements.
Why the Home App Is Not Enough
The Home app is excellent for checking the current state of your home. It can show a sensor value, trigger automations, and help you control accessories.
What it does not provide is a practical, long-term temperature history:
- no room-by-room temperature graph;
- no simple daily or weekly history;
- no way to compare two rooms over several days;
- no exportable log of sensor readings.
That limitation matters when you want to understand patterns instead of moments. A single reading tells you what is happening now. A history shows how your home behaves.
What You Will Build
By the end of this setup, you will have:
- a DataJot series for one HomeKit temperature sensor;
- an Apple Shortcut that reads the sensor value;
- an automation that runs the shortcut at regular times;
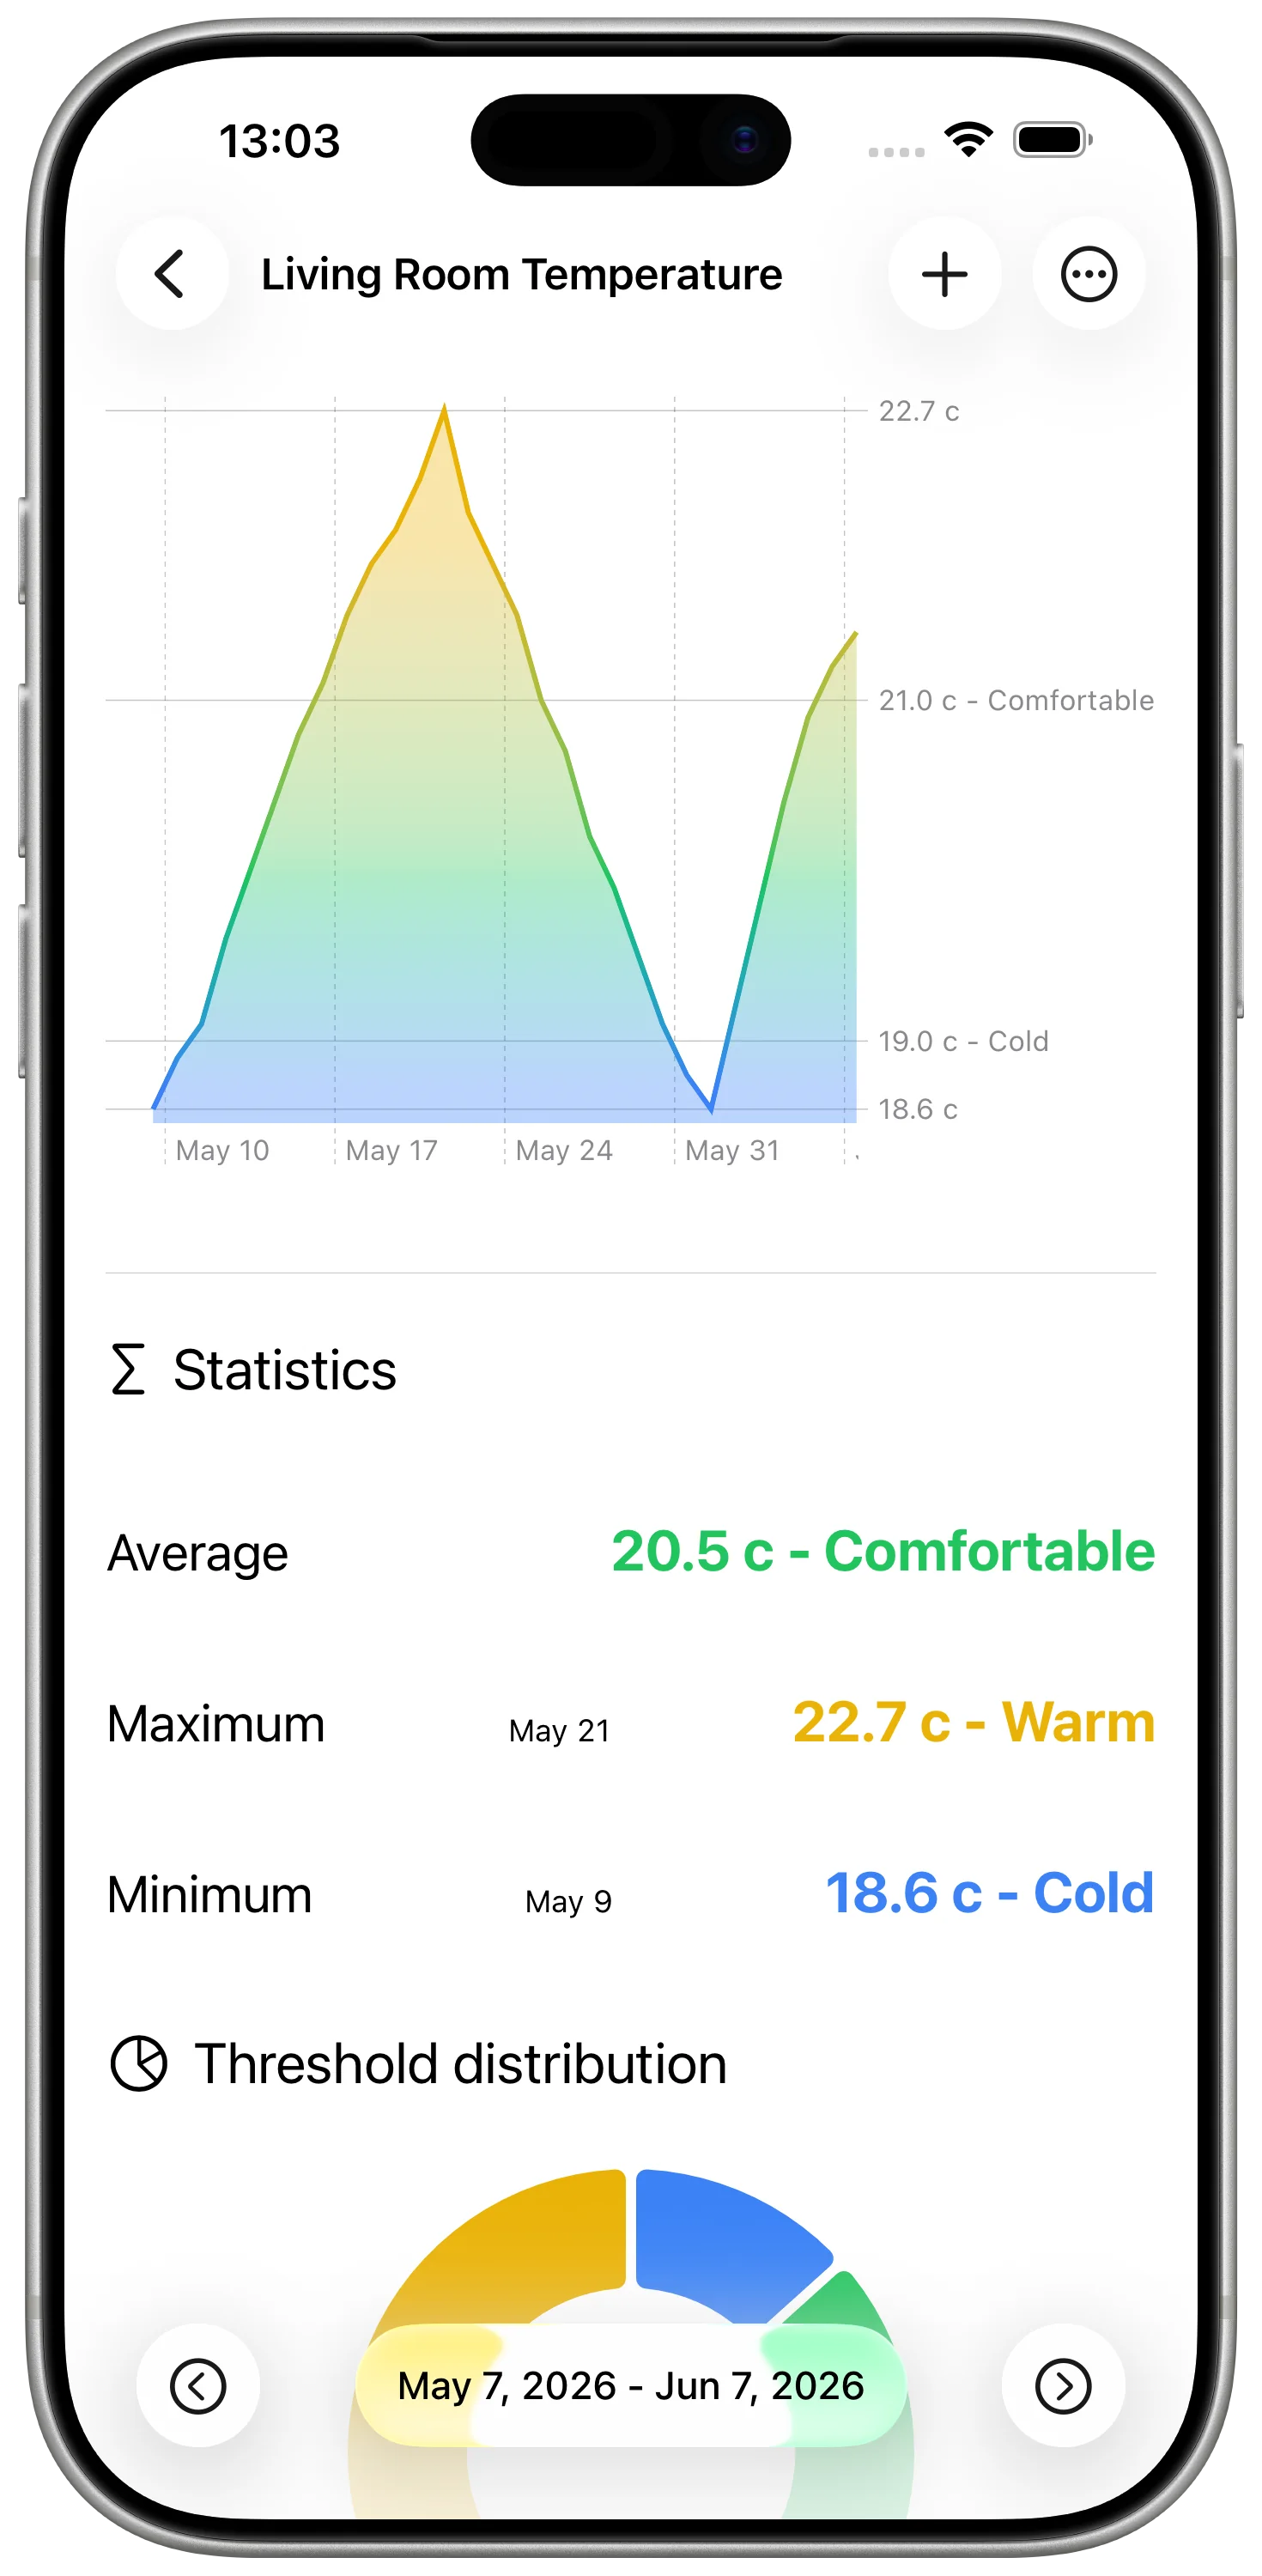
- a temperature history chart you can review in DataJot.
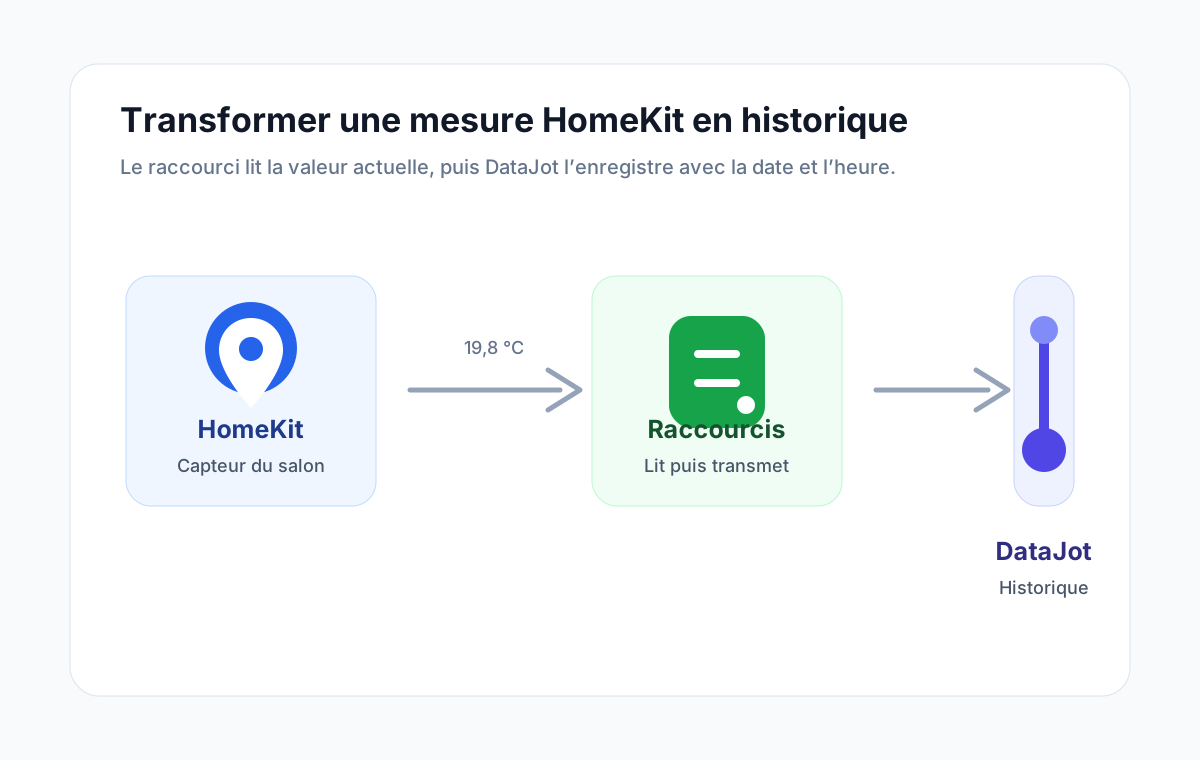
The flow is simple:
HomeKit remains the source of the measurement. Shortcuts moves the value. DataJot stores and visualizes the history.
Requirements
Before starting, make sure you have:
- a HomeKit-compatible temperature sensor;
- the sensor configured in Apple's Home app;
- the Shortcuts app on your iPhone or iPad;
- DataJot installed on the same device;
- iCloud enabled if you want the history on multiple Apple devices.
For the first setup, use one sensor only. Once the shortcut writes the right value to the right series, duplicating it for another room is straightforward.
Step 1: Create a Temperature Series in DataJot
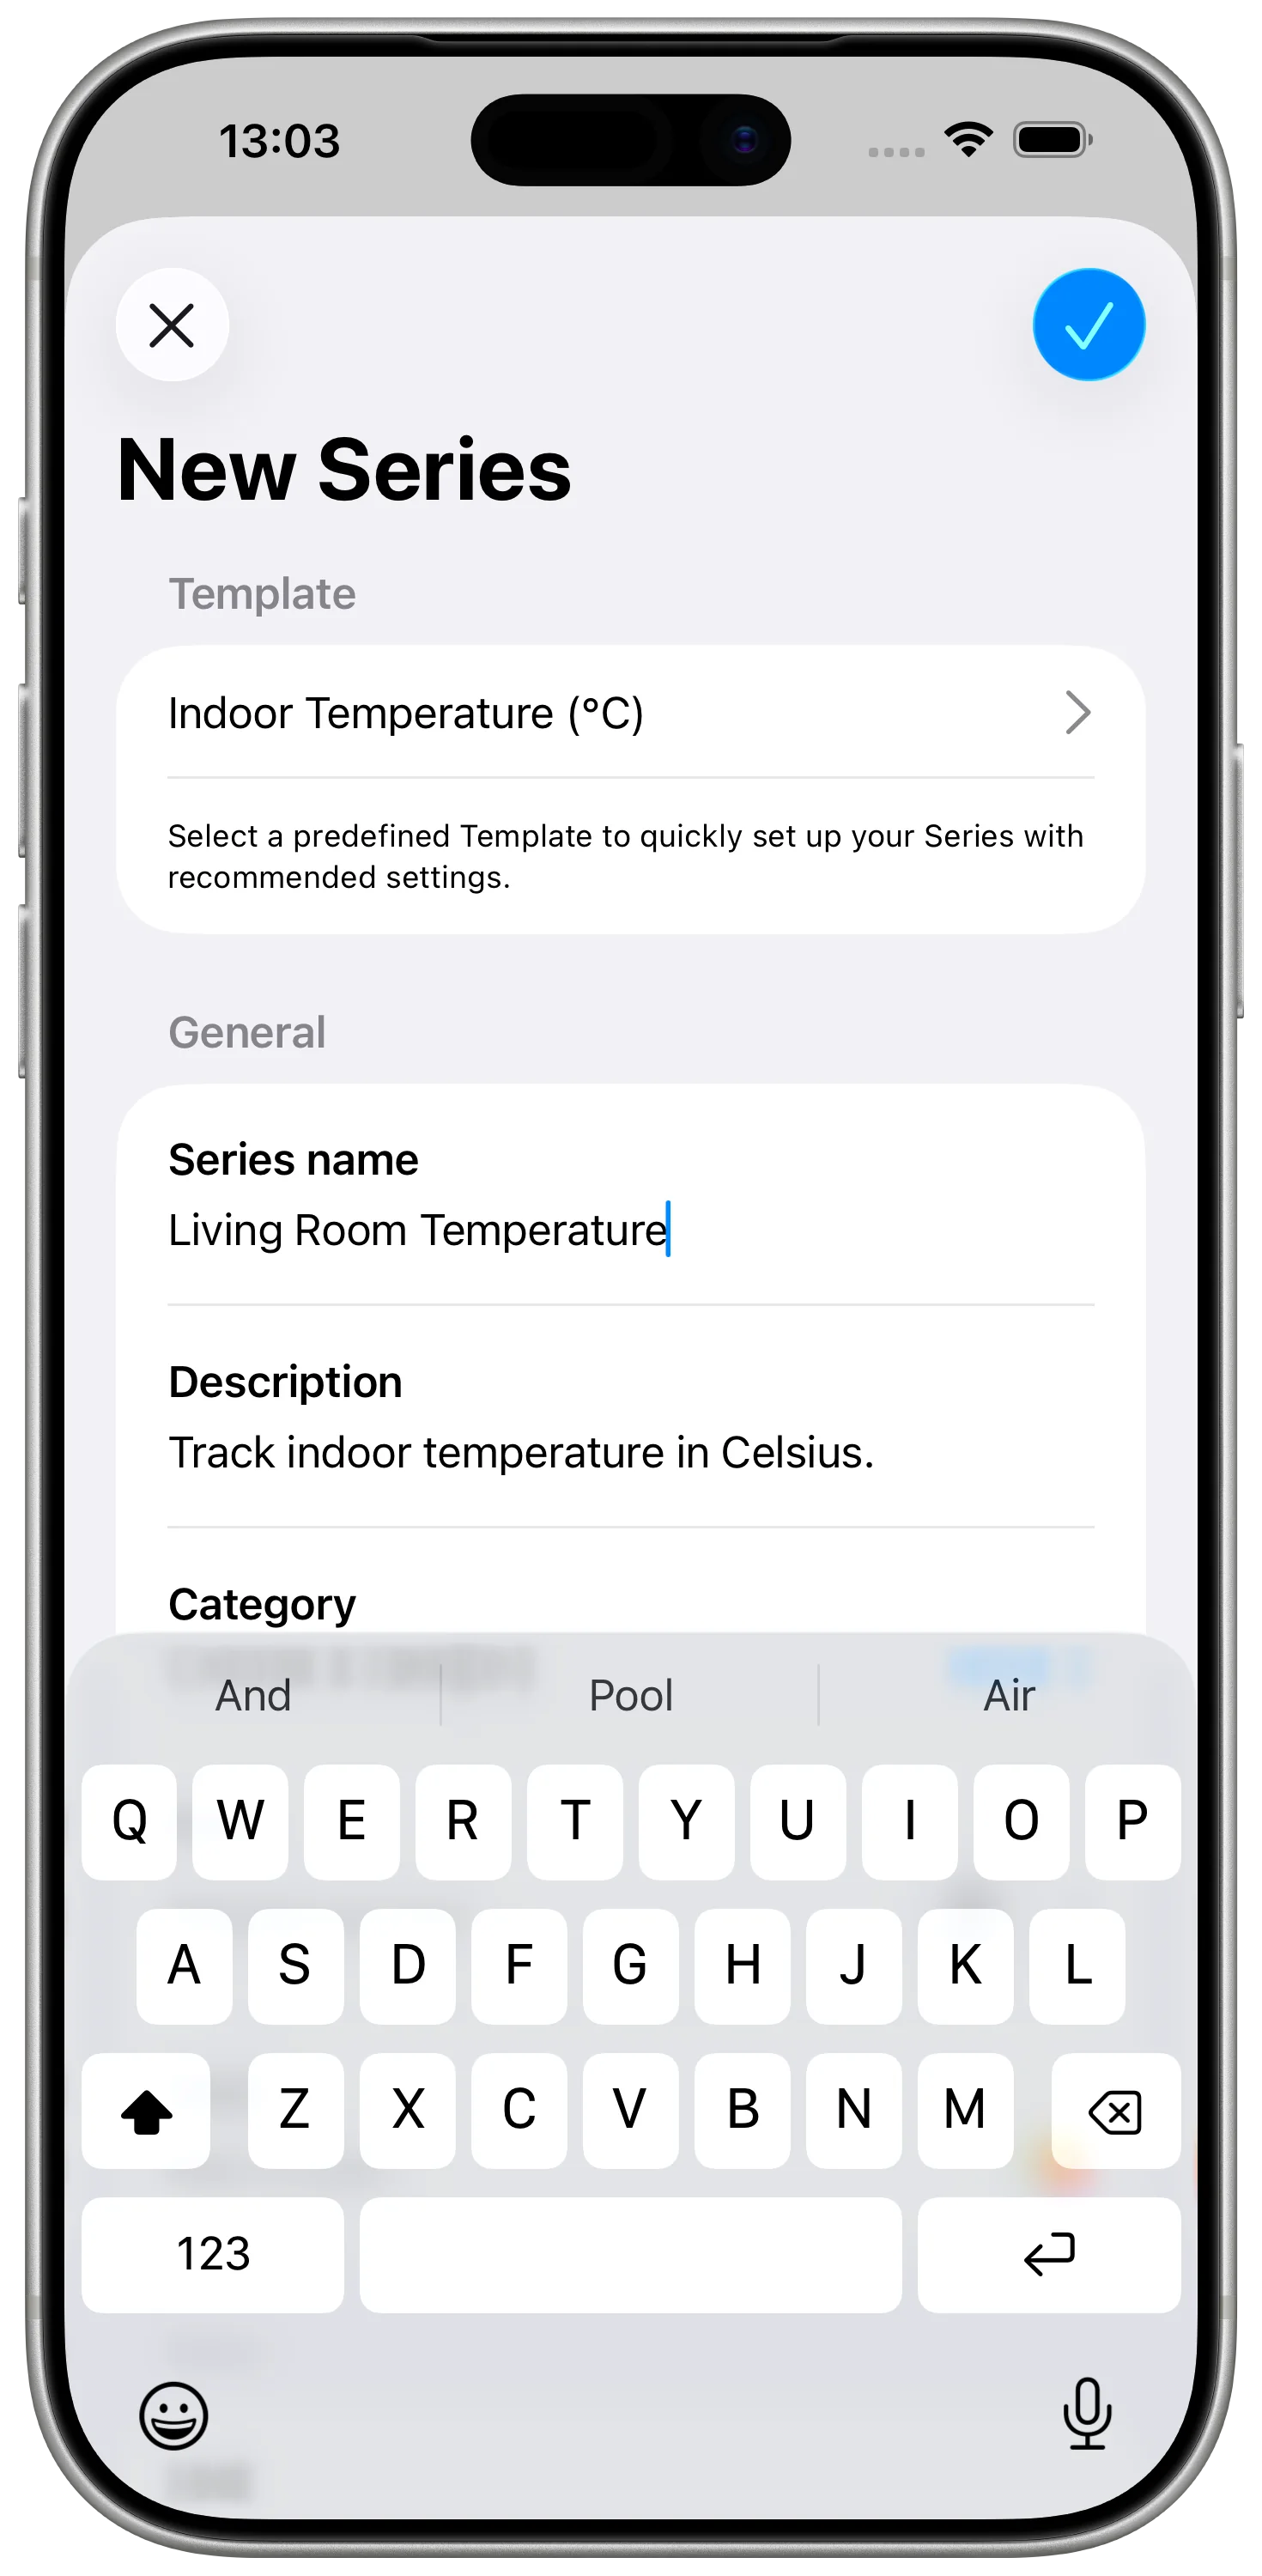
Open DataJot and create the place where the HomeKit readings will be stored.
- Create a new series.
- Name it after the room or sensor you are recording.
- Choose a temperature unit, such as Fahrenheit or Celsius.
- Save the series.
If you are new to DataJot, read the documentation on how to create a series and understand units.
You can start from a series template, such as Indoor Temperature or Outdoor Temperature, then rename it for the room. You can also configure the series manually if you want to choose the unit, graph type, and display options yourself.
That name matters because the Shortcut will save values into this series. If you track another room later, create a separate series instead of reusing the same one.
Step 2: Create the HomeKit Shortcut
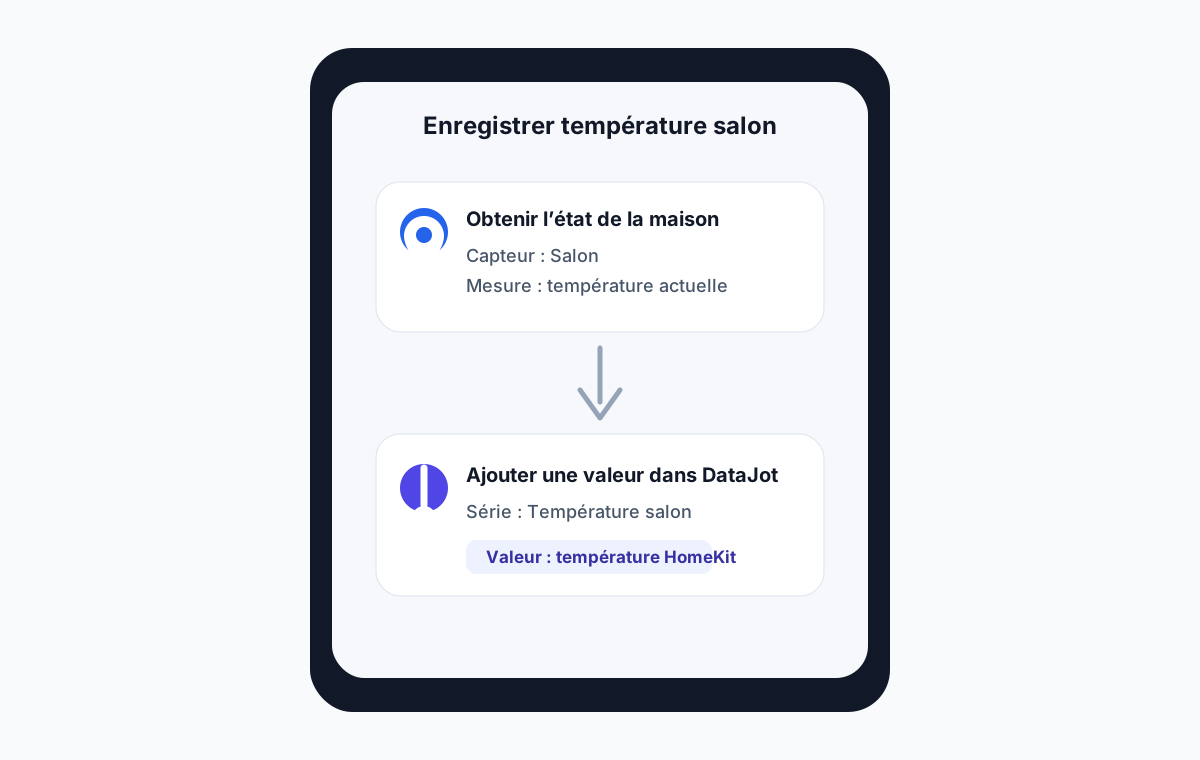
The shortcut needs to do two things: read a HomeKit sensor value, then add that value to DataJot.
- Open Shortcuts.
- Create a new shortcut.
- Add a HomeKit action that gets the state of your home or accessory.
- Select the temperature sensor and its temperature value.
- Add the DataJot action for adding a value to a series.
- Choose your Living Room Temperature series.
- Use the HomeKit temperature value as the value saved in DataJot.
- Name the shortcut, for example Record Living Room Temperature.
The important detail is the value passed between the two actions. The number read from HomeKit should be the number sent to DataJot.
Step 3: Test the Shortcut Manually
Before automating the shortcut, run it once by hand.
- Tap the shortcut's run button.
- Wait for it to finish.
- Open DataJot.
- Confirm that a new point appears in the temperature series.
If no point appears, check the selected sensor, the DataJot series, and the variable passed into the DataJot action. It is better to catch that once than to let an automation run for days without saving the right value.
Step 4: Automate the Recording Frequency
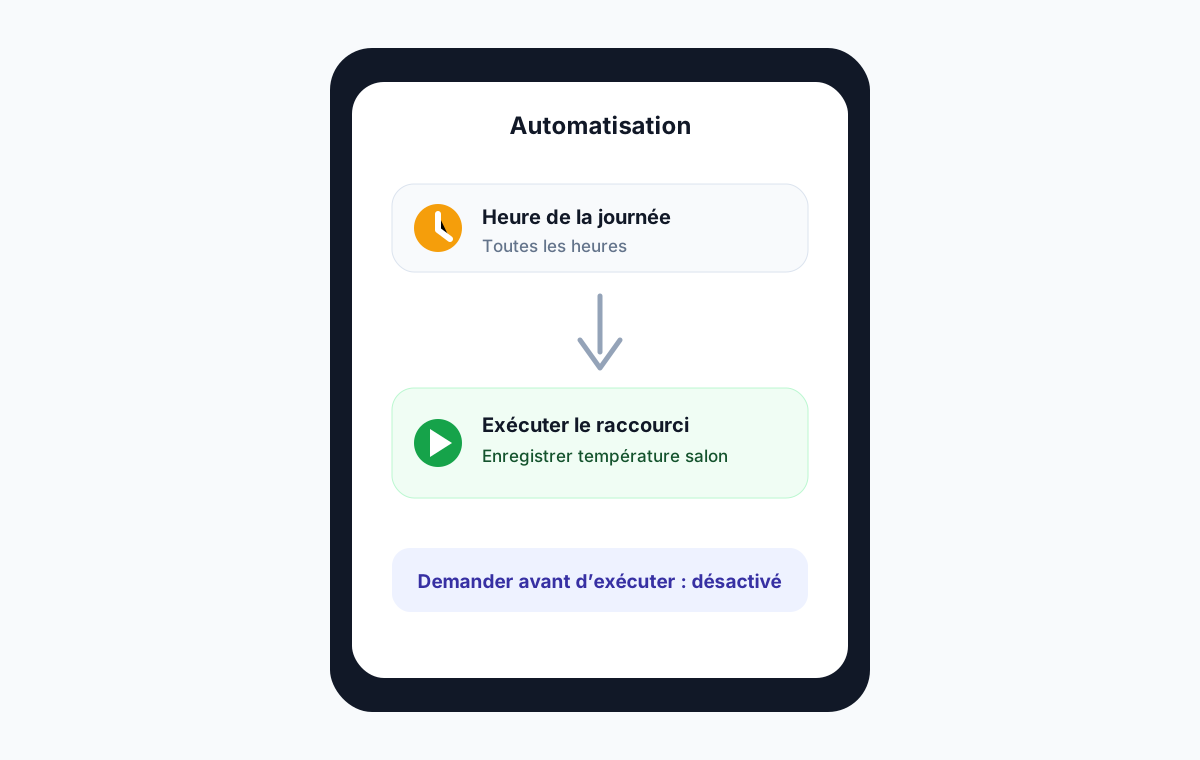
Once the shortcut works manually, create a personal automation in Shortcuts.
- Open the Automation tab.
- Create a new personal automation.
- Choose a time-based trigger.
- Add Run Shortcut.
- Select Record Living Room Temperature.
- Disable confirmation prompts when iOS allows it.
For most homes, you do not need a reading every minute. A value every 15, 30, or 60 minutes is usually enough to understand heating cycles, overnight cooling, and room stability.
If you want multiple readings per day, create several time-based automations. Keep the schedule simple at first, then increase the frequency only if the chart is too sparse.
Step 5: Read the Temperature History
After a few hours or days, open the series in DataJot and review the chart.
Useful patterns:
- a steady drop overnight when heating is reduced;
- a slow morning recovery in rooms that are hard to warm;
- sudden dips when a window is opened;
- higher variance in rooms with poor insulation;
- differences between bedrooms, offices, and living areas.
Those patterns are the reason to keep the history: they show when the room changes, not just what the sensor says right now.
Go Further with Humidity and Air Quality
The same HomeKit plus Shortcuts workflow can track more than temperature. If your accessories expose numeric values, you can create separate DataJot series for:
- bathroom humidity;
- indoor air quality;
- CO2 level;
- brightness;
- outdoor temperature.
For these, the closest templates are Humidity and Indoor Air Quality. If your sensor exposes something more specific, create a custom series instead.
For more focused examples, see How to Track Apple Home Temperature History, How to Make a HomeKit Temperature Graph, Does HomeKit Keep Logs?, How to Build a HomeKit Sensor History, and Track Indoor Humidity and Air Quality with HomeKit.
In Short
HomeKit gives you the current value from your sensors, but it does not give you a useful temperature history. By connecting HomeKit, Apple Shortcuts, and DataJot, you can automatically record readings and review them as charts across your Apple devices.
For additional rooms, duplicate the same shortcut structure and change the sensor plus the DataJot series name.