How to Build a HomeKit Sensor History
Turn HomeKit sensor values into a useful history by recording temperature, humidity, air quality, and other readings with Apple Shortcuts and DataJot.
HomeKit sensors are most useful when they explain how a room behaves over time. The current value matters, but the pattern is often what answers the real question.
Was the office too warm all afternoon, or only for ten minutes? Does the bathroom humidity fall quickly after a shower? Is one bedroom always colder than the others? Those are history questions, not live-status questions.
What Sensor History Means
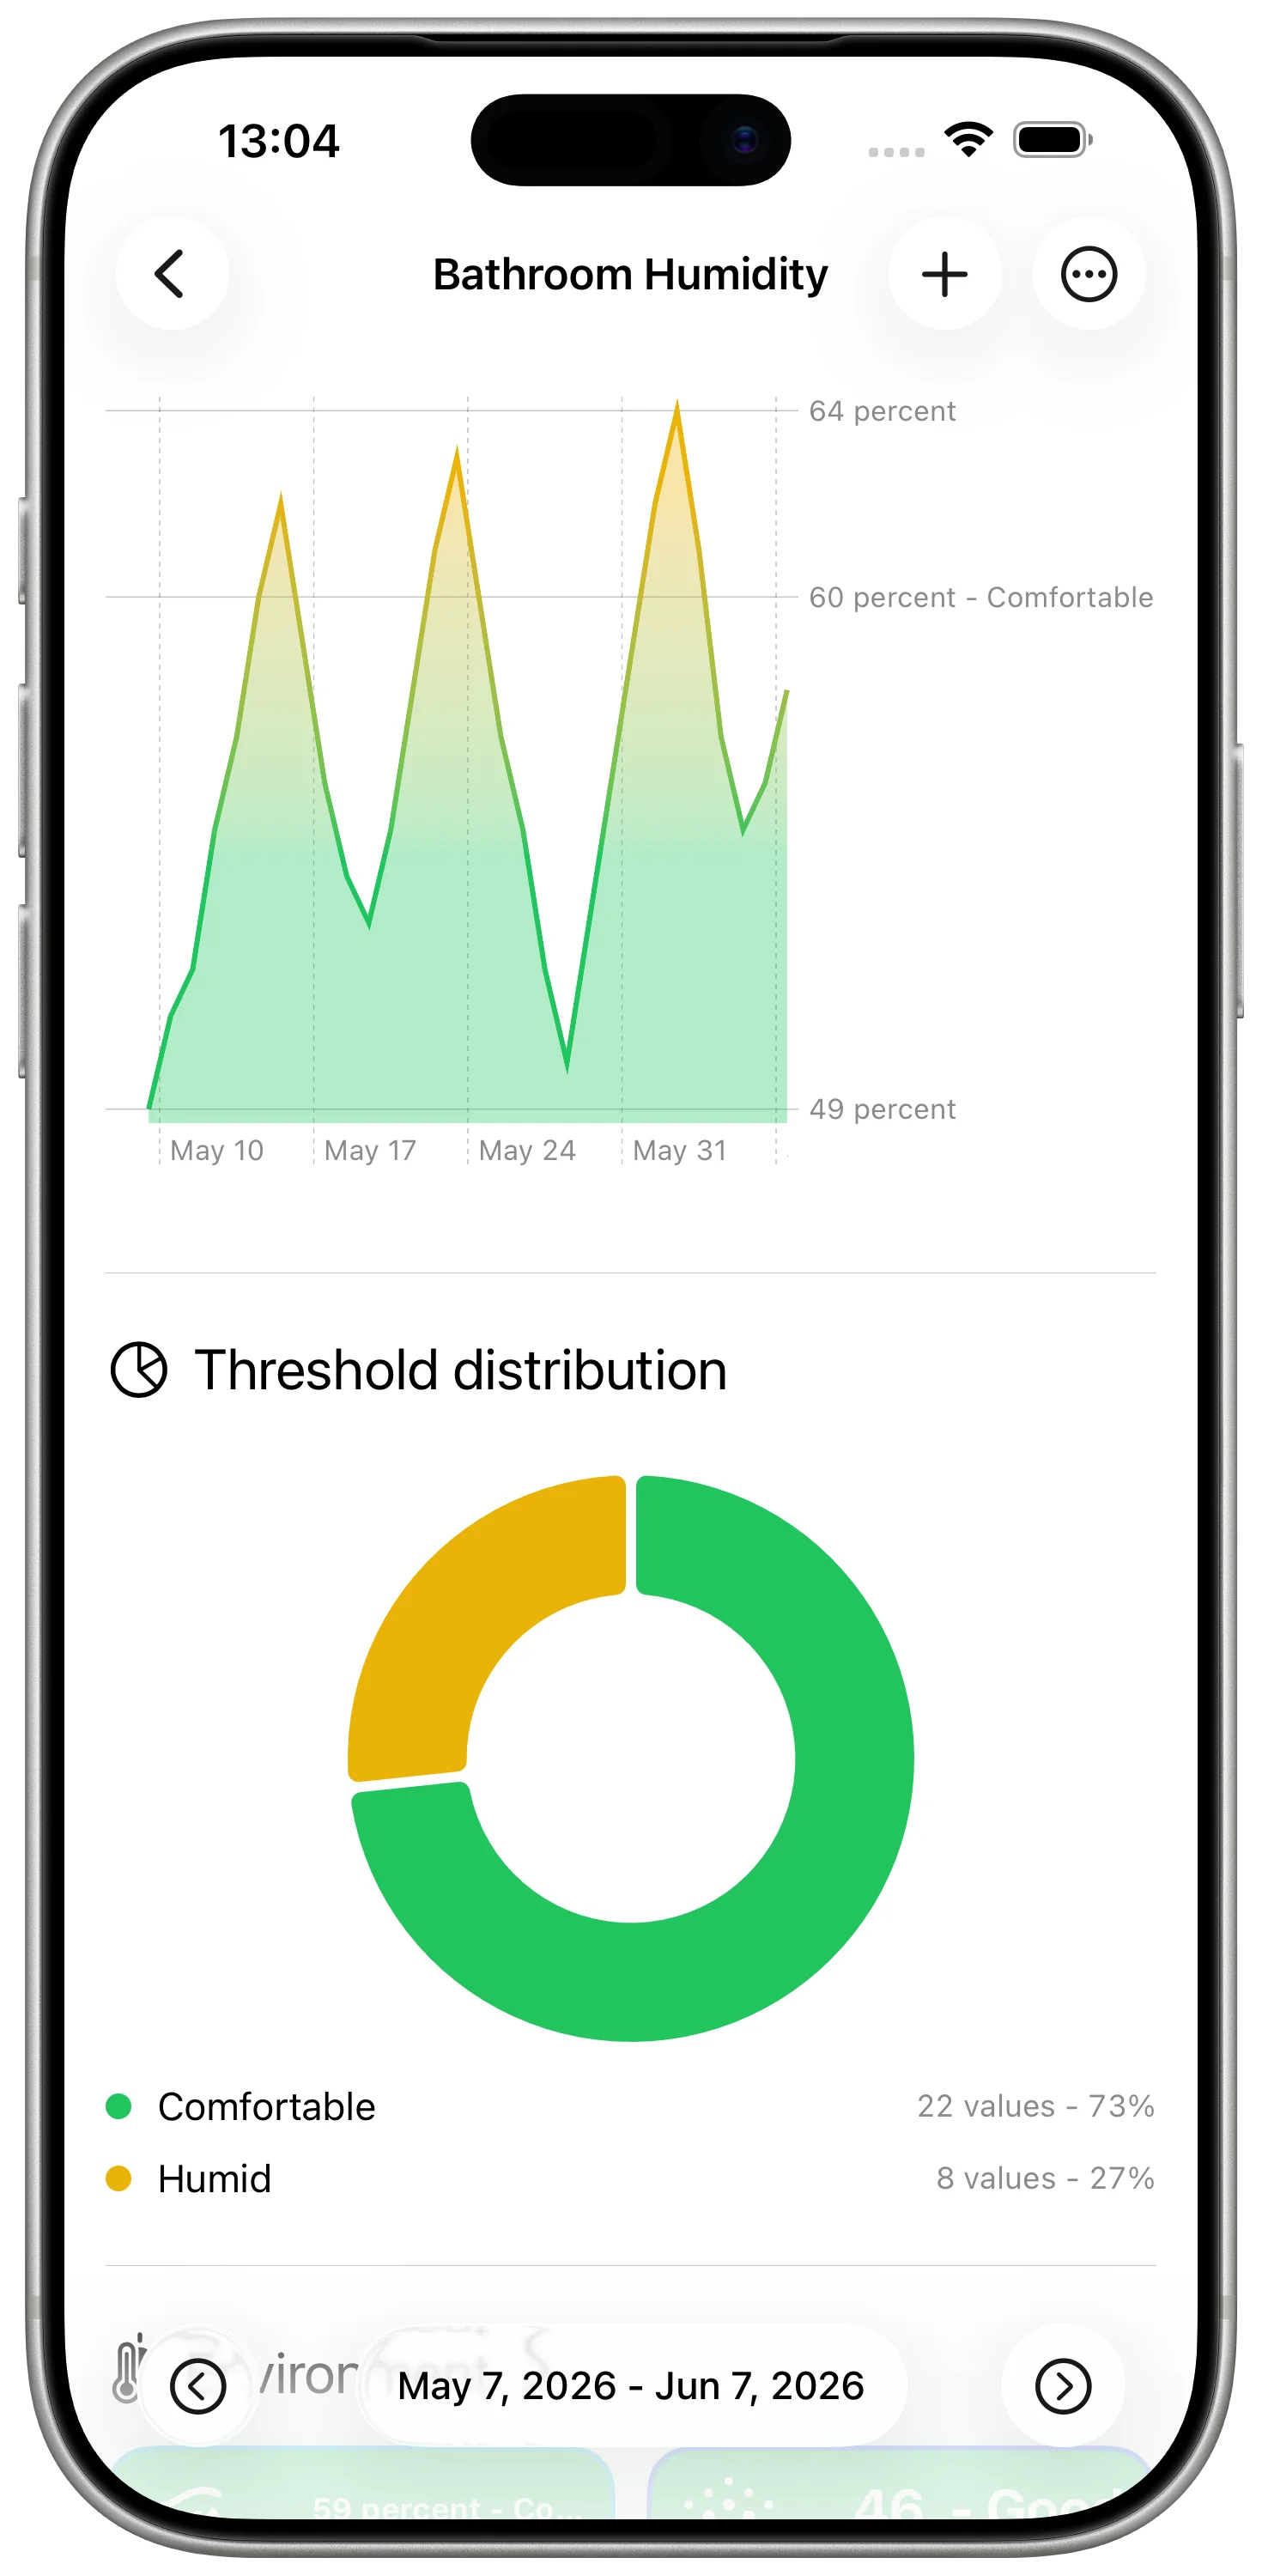
A HomeKit sensor history is a record of repeated readings from the same accessory or room.
Instead of checking a value once, you collect it at regular intervals:
- bedroom temperature every hour
- bathroom humidity after morning and evening routines
- office air quality throughout the workday
- outdoor temperature a few times per day
The exact schedule depends on the measurement. You do not need perfect data. You need enough points to see the shape of the day.
Choose One Sensor per Series
The simplest rule is also the most important one: one sensor should write to one DataJot series.
Do not mix bedroom temperature and living room temperature in the same series. Do not mix humidity and air quality. A clean series makes the chart readable and keeps future comparisons honest.
Good names help too:
- Bedroom Temperature
- Bathroom Humidity
- Office Air Quality
- Outdoor Temperature
Those names will also make your Shortcuts easier to maintain later.
Use Shortcuts as the Bridge
Apple Shortcuts is the bridge between HomeKit and DataJot.
A basic shortcut has two jobs:
- read the current value from a HomeKit accessory;
- add that value to the matching DataJot series.
Run it manually the first time. Once the right value appears in DataJot, create a personal automation that runs the shortcut on a schedule.
For many room measurements, 30 or 60 minutes is enough. Start with a light schedule. You can always add more readings later if the graph feels too sparse.
Start with a Temperature Workflow
If you have never recorded HomeKit data before, start with temperature. It is easy to understand, easy to verify, and useful after only a few days.
The detailed walkthrough is here:
Track HomeKit Temperature History with Apple Shortcuts
That guide shows the complete setup. After it works for temperature, the same pattern can be reused for humidity, air quality, brightness, or other numeric HomeKit values.
Keep the History Useful
A sensor history is only useful if you can read it later.
Keep these habits:
- use one series per sensor
- keep units consistent
- avoid recording more often than you need
- name shortcuts after the room and measurement
- check the chart after a few days, not just after the first run
The goal is not to collect data for its own sake. The goal is to notice patterns you would otherwise miss.
In Short
HomeKit gives you live sensor values. DataJot lets you turn those values into history. Start with one sensor, record it consistently with Shortcuts, then expand only when the first chart is useful.