How to Track Apple Home Temperature History
Apple Home shows current sensor readings, but not a useful temperature history. Learn how to record HomeKit temperature values with Shortcuts and DataJot.
Apple Home can tell you the current temperature in a room, but it does not give you a simple history of that temperature over time. If you want to know how cold a room gets overnight or how long it takes to warm up in the morning, you need to record the sensor readings somewhere else.
With DataJot and Apple Shortcuts, you can build a lightweight Apple Home temperature history without running a server or replacing your HomeKit setup.
The Problem: Apple Home Shows Now, Not History
HomeKit temperature sensors are useful because they are already part of the Home app. You can check a room, create automations, and use the value as part of your smart home.
The missing piece is historical context. Apple Home does not give you a practical way to review:
- yesterday's temperature curve;
- overnight lows;
- weekly room stability;
- differences between two rooms;
- the effect of heating schedules.
That is where a dedicated time-series app helps.
The Setup
The setup has three parts:
- HomeKit sensor: the source of the temperature value.
- Apple Shortcuts: the bridge that reads the sensor.
- DataJot: the place where each reading is stored and charted.
If you already have a HomeKit sensor visible in the Home app, you can keep using it exactly as it is.
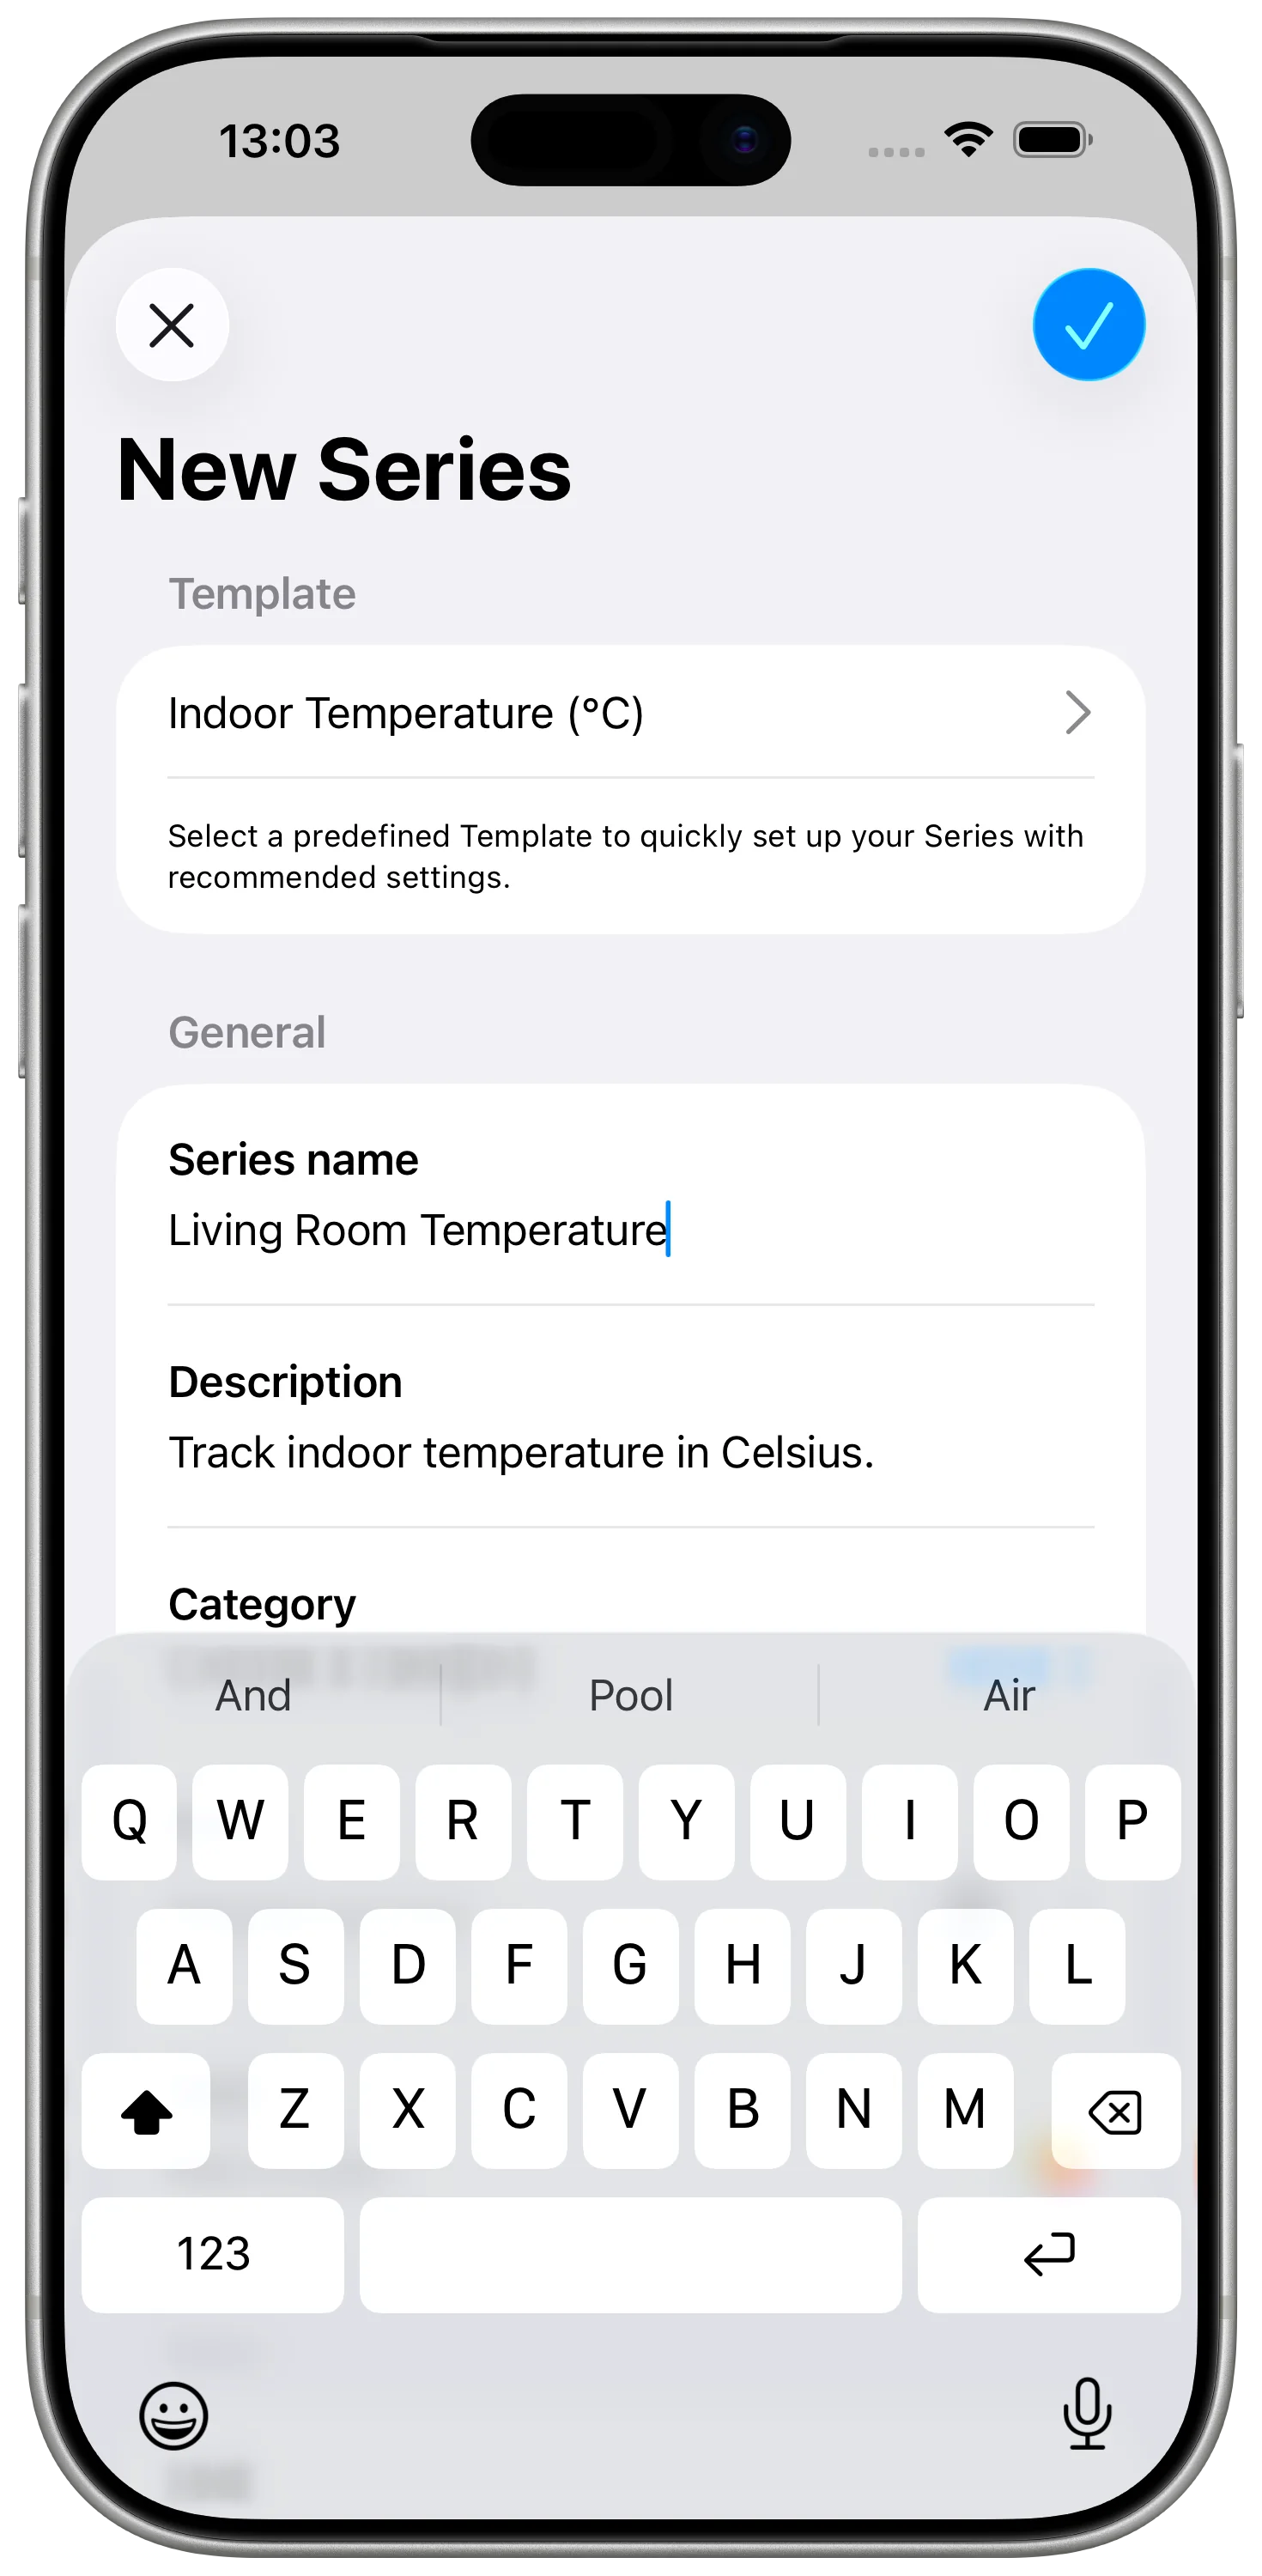
Step 1: Create a DataJot Series
Create one DataJot series for the exact sensor or room you are recording. The name should tell you where the value came from, because that same name will be used later in the Shortcut.
Choose the temperature unit you normally use and keep it consistent for that series. Mixing Celsius and Fahrenheit in the same history will make the chart hard to read.
You can use a template like Indoor Temperature or Outdoor Temperature to start faster, or configure the series entirely yourself if you want to choose every option.
Step 2: Save the HomeKit Value with Shortcuts
In Shortcuts, create a shortcut that reads your HomeKit temperature sensor and saves the numeric value in DataJot.
The shortcut should:
- get the current temperature from the HomeKit accessory;
- pass that value into the DataJot add-value action;
- save it to the correct temperature series.
Run the shortcut manually once and confirm that DataJot receives a new point.
For a full step-by-step walkthrough with screenshots, see Track HomeKit Temperature History with Apple Shortcuts.
Step 3: Choose a Recording Schedule
Temperature does not usually need second-by-second tracking. For a room sensor, one value every 30 or 60 minutes is usually enough to show heating cycles, overnight drops, and morning recovery.
If you create several automations, make the schedule obvious in the automation name so you can edit or remove it later without guessing what it does.
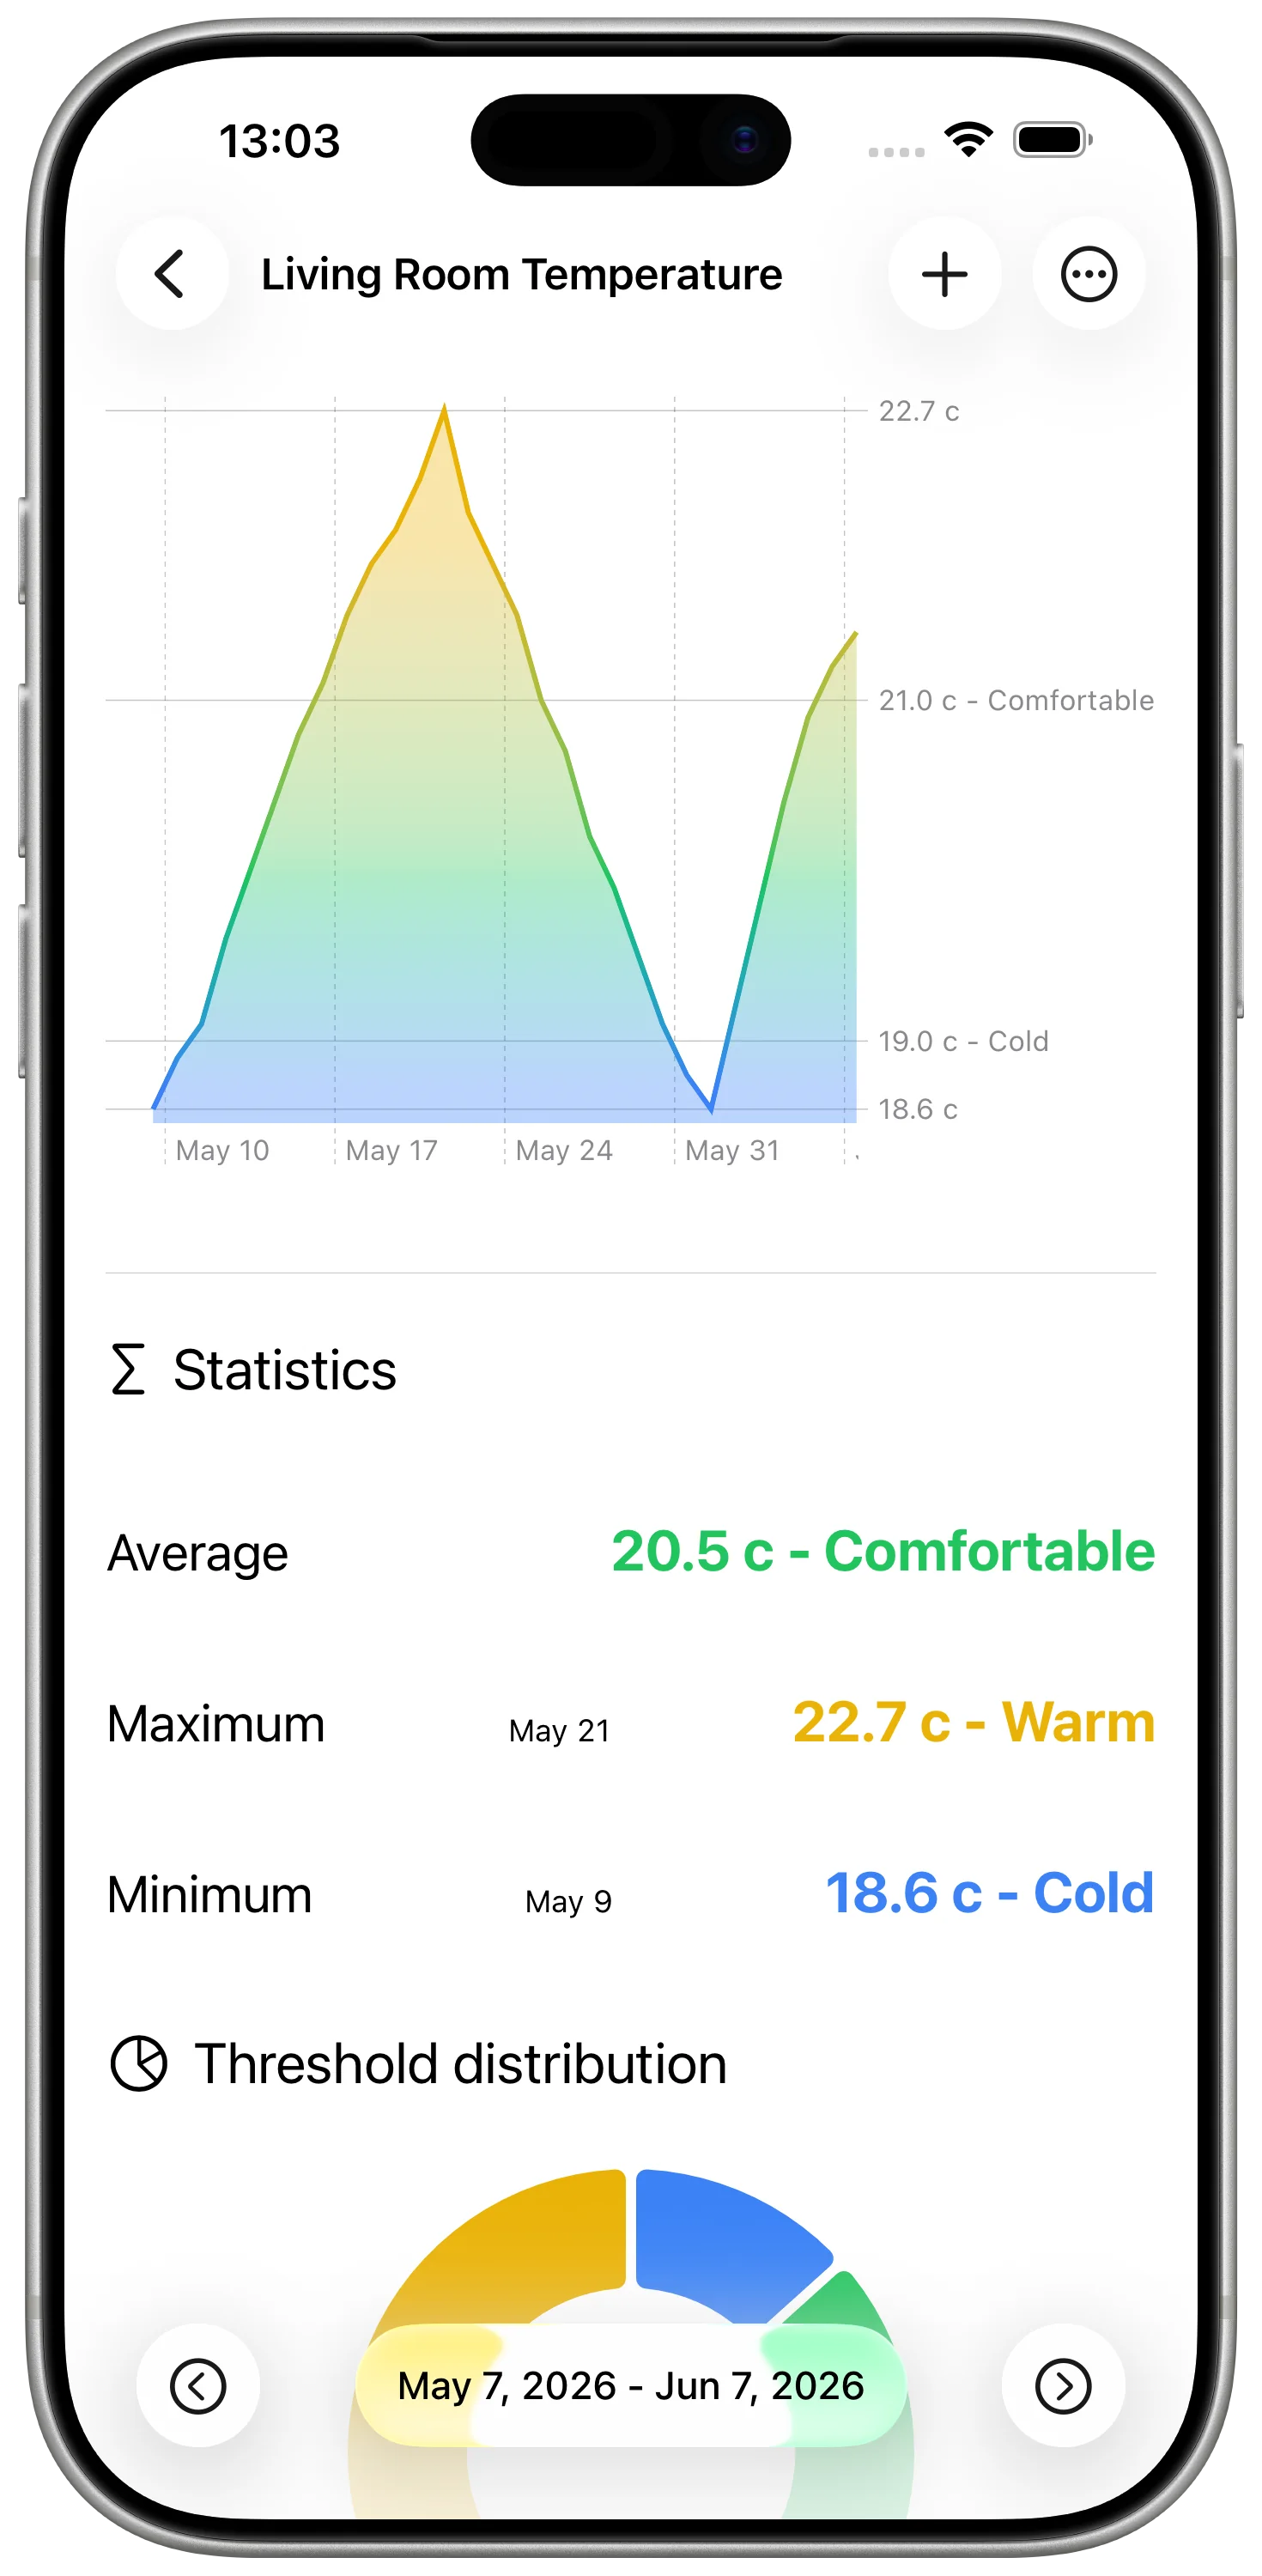
What to Look For in the History
Once you have a few days of data, review the temperature history for patterns.
Useful checks:
- Does the room cool down too much overnight?
- How long does it take to return to a comfortable temperature?
- Is one room consistently colder than the rest?
- Does opening a window create a visible drop?
- Is the thermostat schedule aligned with actual room behavior?
The value is not the number itself. The value is seeing the trend.
Add More Rooms Later
For a second room, duplicate the shortcut and change only two things: the HomeKit sensor and the DataJot series.
Keep one DataJot series per sensor or per room. This makes it easier to compare bedroom, living room, office, and outdoor readings without mixing unrelated values.
If you also want a more visual chart-focused setup, read How to Make a HomeKit Temperature Graph.
In Short
Apple Home is useful for current temperature, but it is not built for long-term temperature history. DataJot and Apple Shortcuts give you a simple way to record HomeKit sensor readings and turn them into a chart you can actually review.